In this beginner’s guide to Adobe After Effects, we’ll dive into creating engaging visual effects and motion graphics. This lesson focuses on a straightforward yet captivating project: animating a flying plane. You’ll learn to initiate a new project, import image files, and animate using simple position keyframes. By the end, you’ll grasp the essentials of After Effects and basic animation techniques, setting a solid foundation for your journey into visual storytelling. Let’s begin animating your creative visions!
1. Common Shortcuts in After Effects
For a quick and efficient workflow in After Effects, knowing and using shortcuts is crucial to optimize your time. While you don’t need to memorize all of them, familiarizing yourself with the common ones is essential.
Layer properties shortcuts:
P: Position
S: Scale (Size)
T: Transparency (Opacity)
R: Rotation
U: Reveal/Hide all properties that are animated (have keyframes)
Other shortcuts:
Spacebar: Play/Pause
+/- (in main keyboard): Zoom in/out timeline
Page Up/Page Down: Move frame-to-frame
F9: Easy Ease
2. The Project: Flying Plane
The images I used for this project were downloaded from Pixabay.com. You’re free to use any similar images you like. Remember the airplane image should be a cutout of the airplane only, and in PNG format.
Airplane: https://pixabay.com/vectors/airplane-plane-aircraft-airliner-7719425/
Background: https://pixabay.com/vectors/landscape-twilight-light-night-1844230/
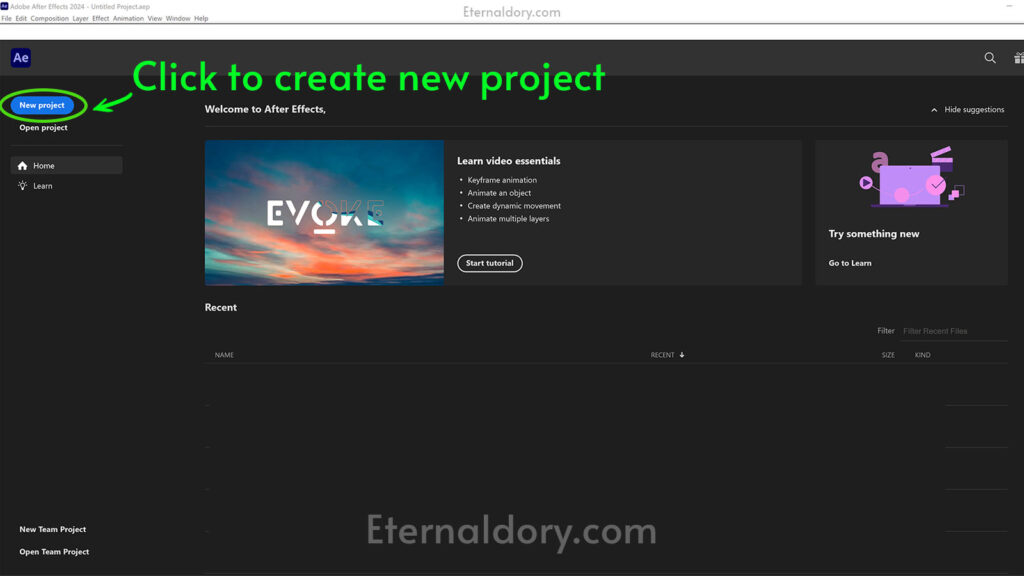
STEP 1: Click to create New Project
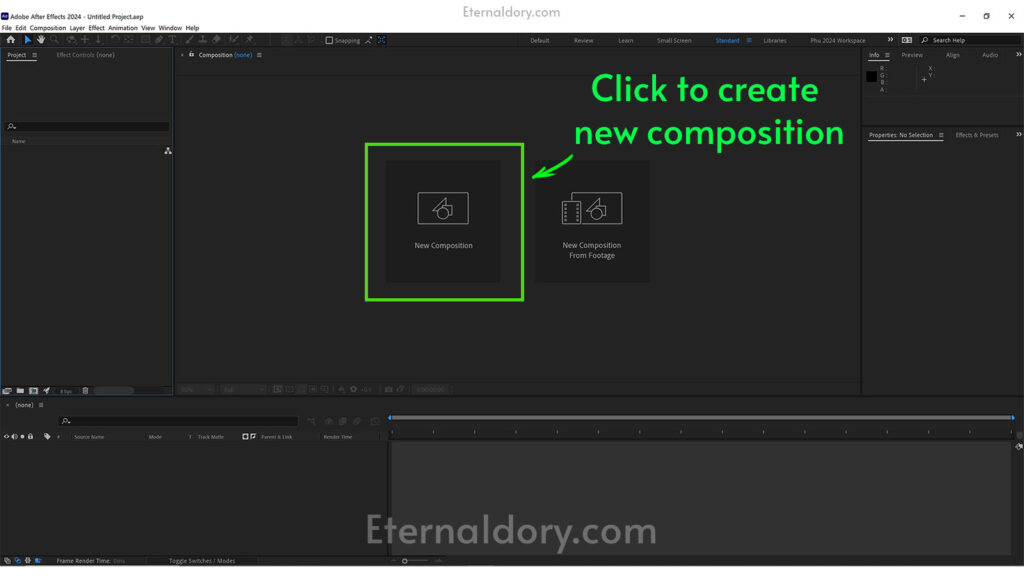
STEP 2: Click to create New Composition
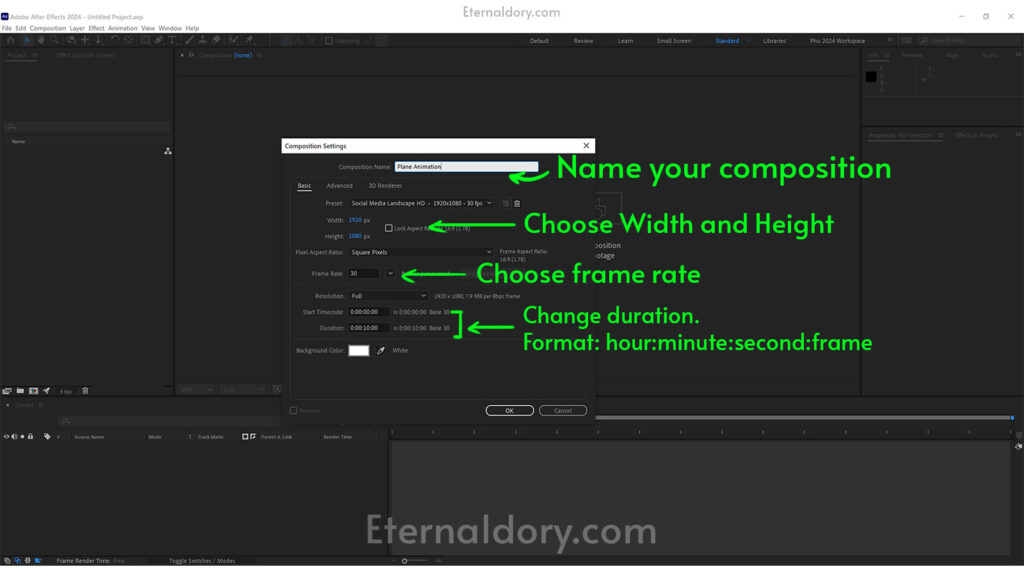
STEP 3: Change the setting of the composition
Choose a name that’s relevant to your composition.
1920×1080 px is a common resolution for Youtube videos.
A frame rate of 30 FPS is versatile and popular in today’s videos.
The duration’s format is hh:mm:ss:ff (hour:minute:second:frame). In our case, since we choose 30 FPS, the maximum number of frames each second is 30.
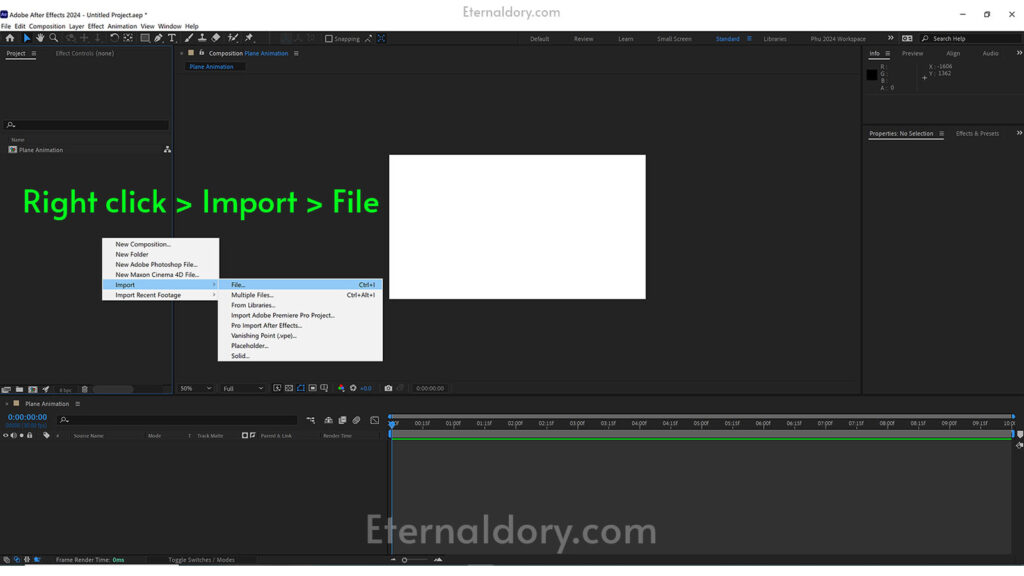
STEP 4: Import file
There are three ways to import files in After Effects:
- Drag files directly from window folders into AE project panel.
- File > Import
- Right click anywhere in AE project panel > Import > File
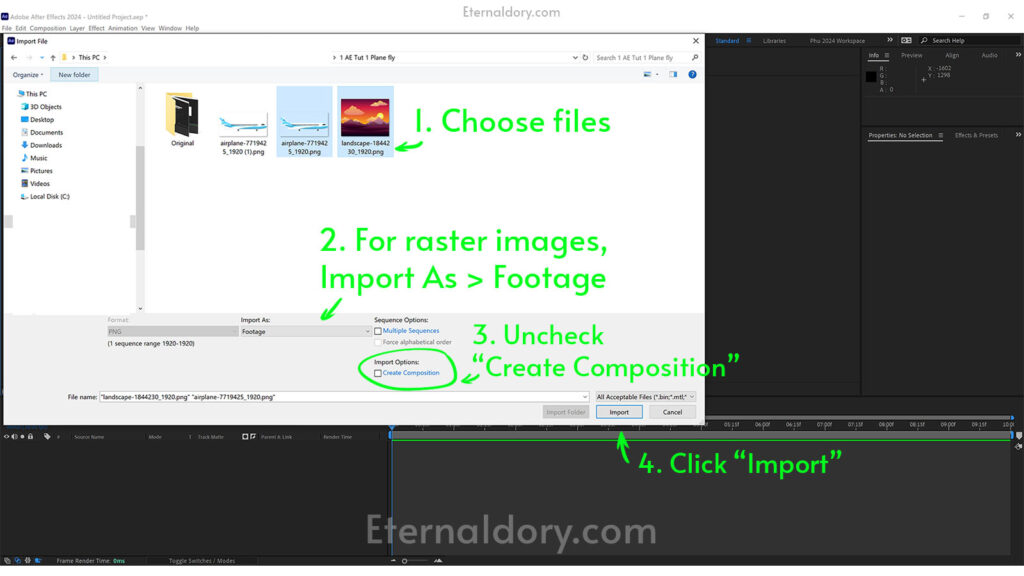
STEP 5: Choose files to import
For this project we’ll just import PNG image files only (one airplane, one background). We import them as “Footage”. Remember to uncheck “Create Composition” since we already created a composition.
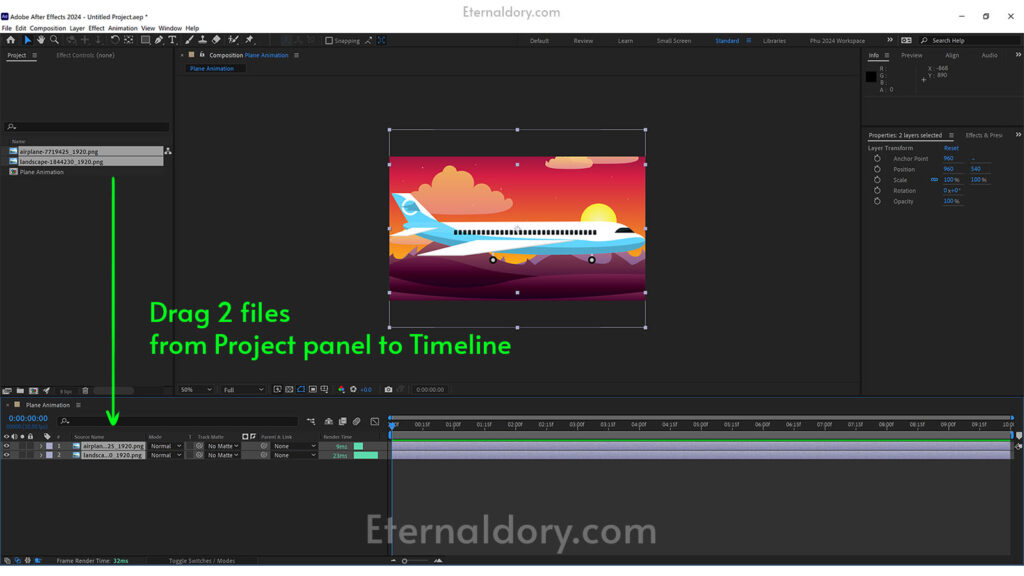
STEP 6: Drag files into timeline
Drag 2 images from project panel down to Timeline. Remember to place the airplane layer above the background layer in the timeline.
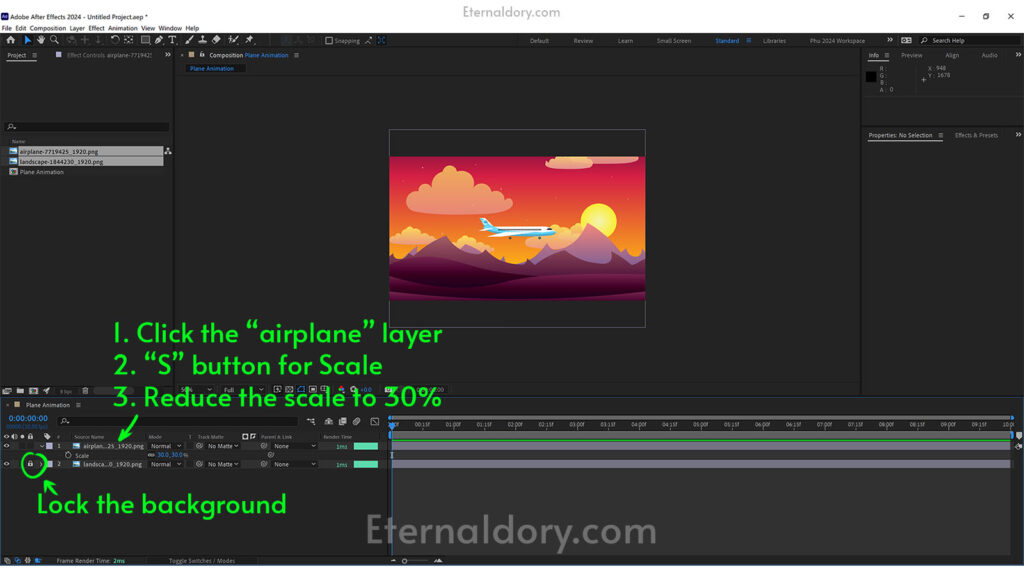
STEP 7: Change the plane’s size. Lock the background.
We lock the background layer to avoid accidentally messing with it.
Click the “airplane” layer to make it active layer. Hit S to reveal “Scale” property. Change the scale value either by drag the blue value left and right or click the blue value and enter the scale value directly into the box.
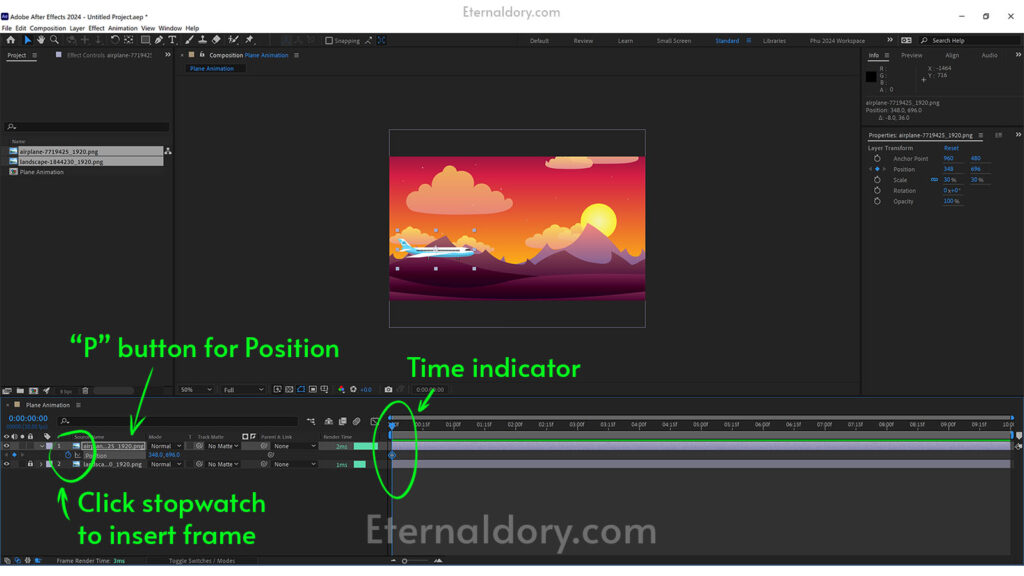
STEP 8: 1st keyframe
With plane layer is active, drag the time indication in the timeline to the frame 0. Hit P to reveal Position property. Click the stopwatch to insert our first frame. Drag the plane to a desired original position. You can also change the plane’s position by changing the value in Position property (drag left and and right).
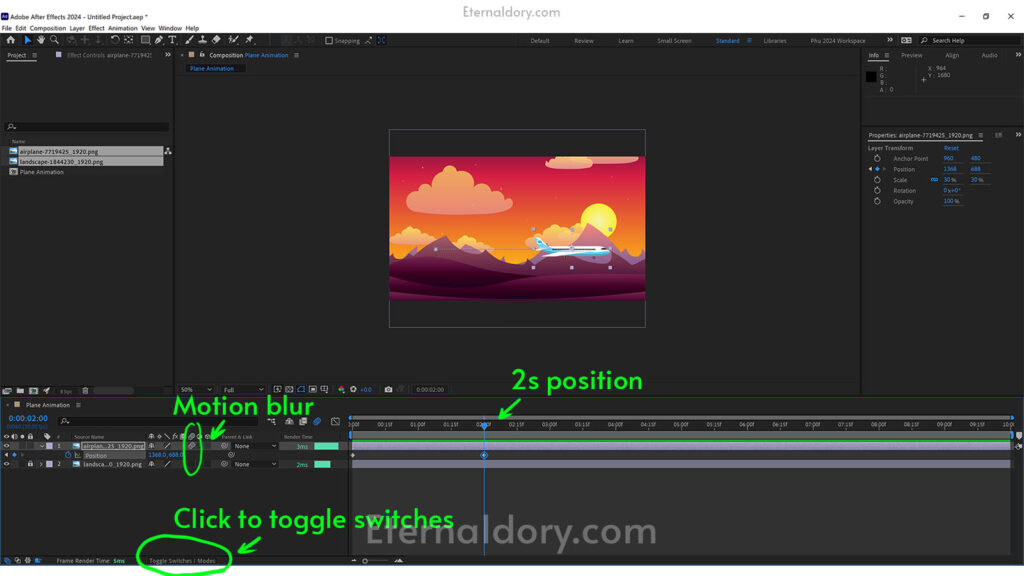
STEP 9: 2nd keyframe. Toggle switches. Motion blur.
Drag time indication to the 2 second mark. Drag the plane to a new position. A second keyframe will be added into the timeline.
Check the Motion Blur box of the plane layer to turn on motion blur. If you don’t see the box, you can click the “Toggle Switches/Modes” button at the bottom to switch between layer modes and matte modes.
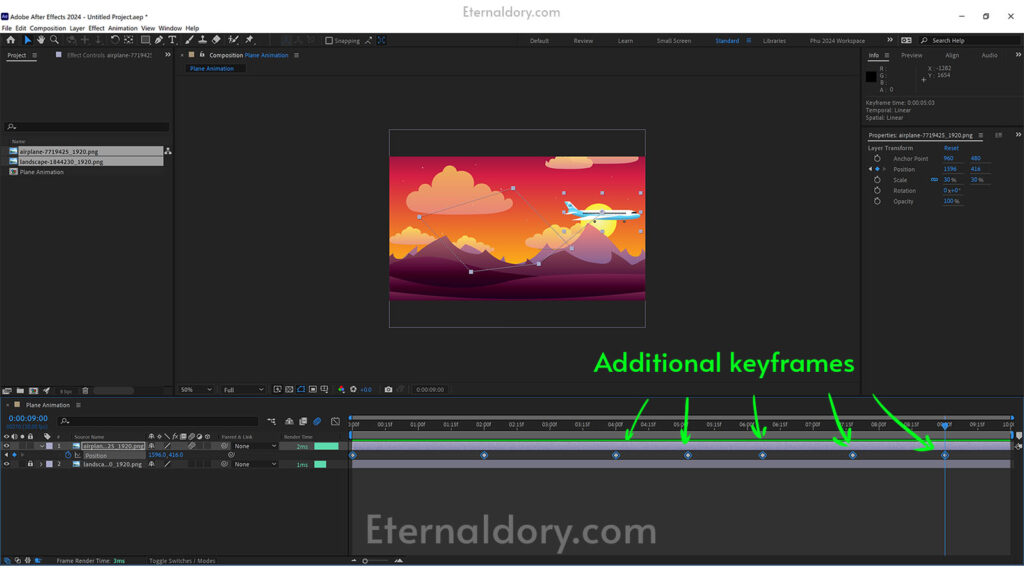
STEP 10: Additional keyframes
Drag time indication to the next marks in the timeline. Drag the plane to a new position for each new added keyframe. Make sure the plane would fly back and forth, up and down.
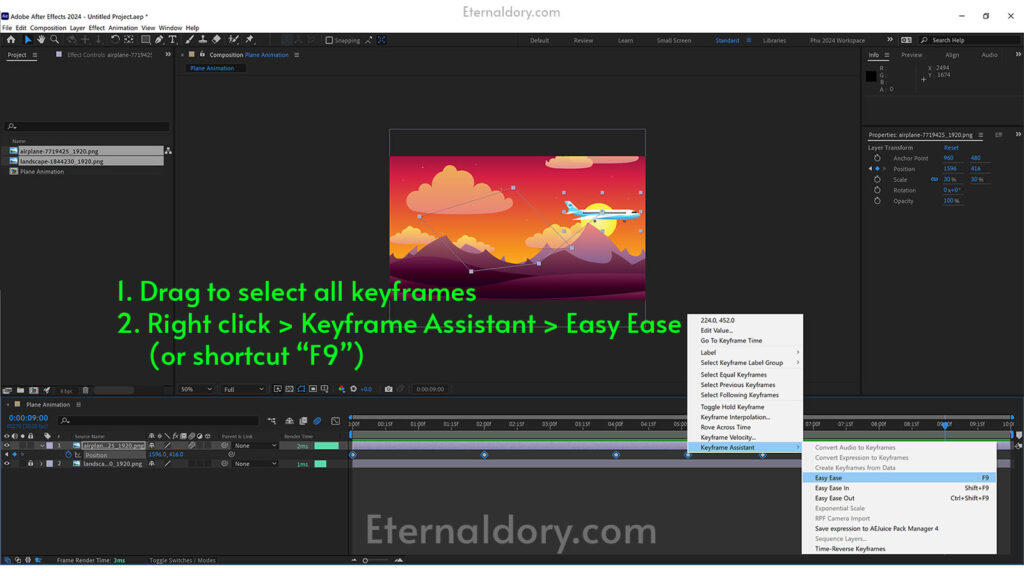
STEP 11: Easy ease
In the timeline, drag to select all keyframe. Hit F9 to Easy Ease the keyframes.
Easy Ease is the combination of 2 effects: Easy Ease In and Easy Ease Out.
Easy Ease Out means the plane would gradually increase its speed as it starts to move forward.
Easy Ease In means the plane would gradually decrease its speed as it approaches the final position.
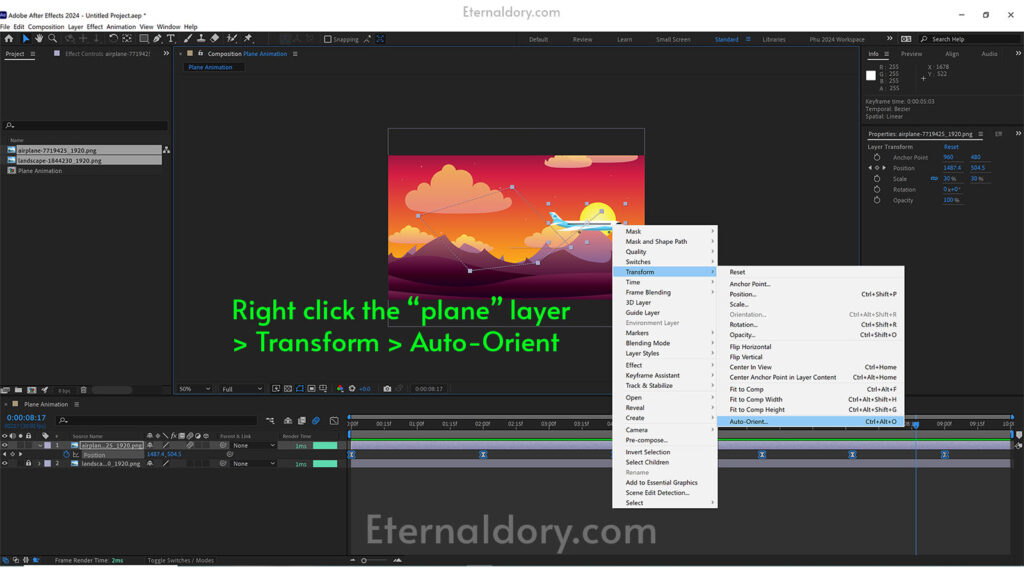
STEP 12: Auto-orient
Auto-Orient ensures that the plane’s nose always follows the flight trajectory, keeping the nose at the forefront as it moves forward.
STEP 13: Export
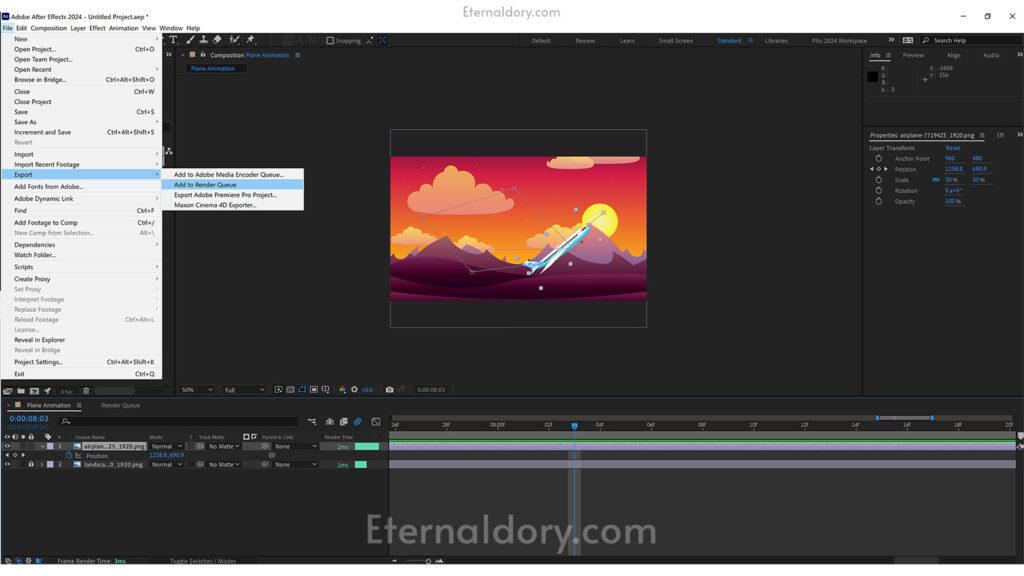
File > Export > Add to Render Queue
“Add to Render Queue” would render the video directly in After Effects. I find “Add to Render Queue” is more stable than “Add to Adobe Media Encoder Queue…”, either for simple projects like this or more complicated ones.
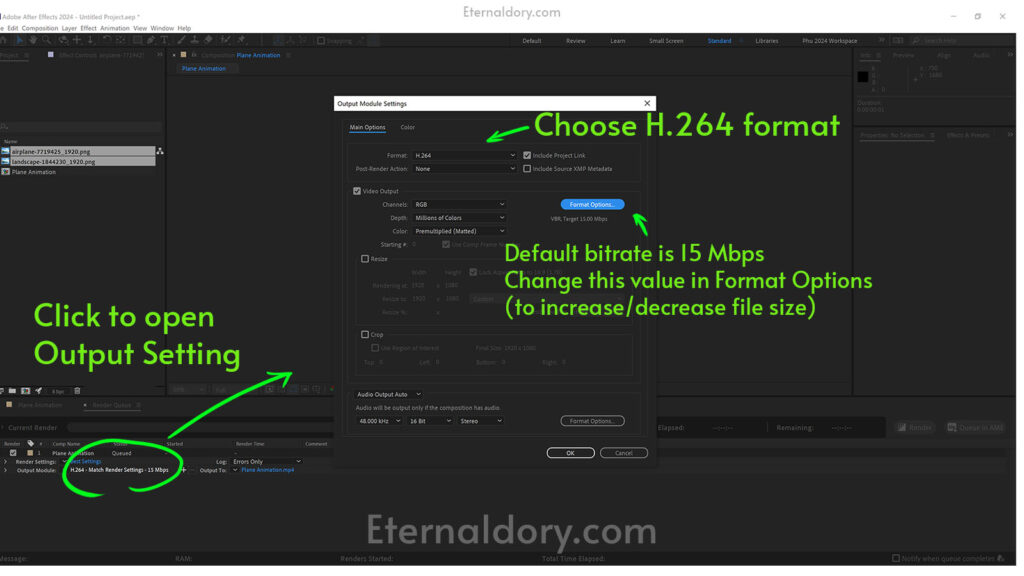
STEP 14: Output Setting
Click the Blue line next to “Output Module” to open output setting window. I leave everything in default for this project. In more larger size projects, you can change the output file size by changing the bitrate value in “Format Options…”
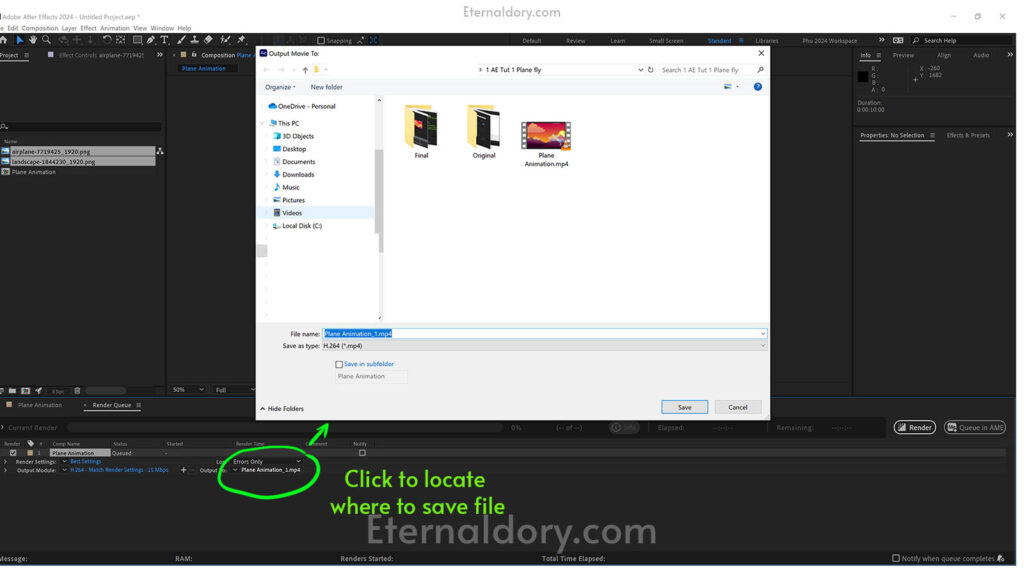
STEP 15: Save file location
Click the Blue line next to “Output to” to open save file window. Choose a file location. Change the file name. Then, click Save.
Finally, click the “Render” button at the bottom right to start render the video. Wait until AE render the video 100%
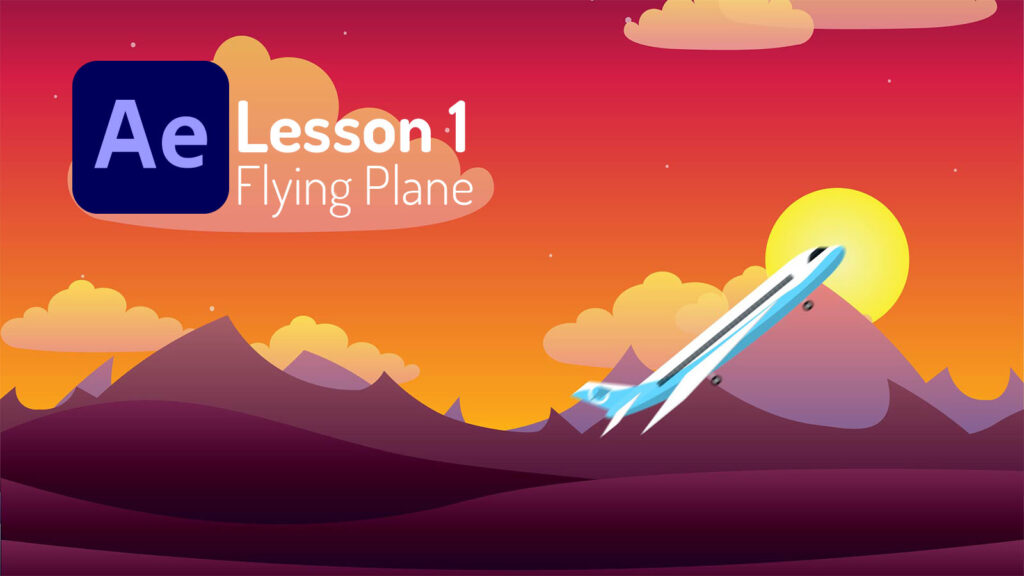
FINAL PRODUCT
Congratulation! You finally finish your first animation using After Effects.

THE END
After Effects online course tutorial for beginners in 2024.
After Effects software: https://www.adobe.com/products/aftereffects.html
Read more motion graphics articles: https://eternaldory.com/category/graphics/motion-graphics/

Phu is the Head Writer at Eternal Dory, where his pen dives into the latest global trends and news in knowledge, graphic design, metaphysics, and entertainment. He has a knack for highlighting the fun aspects of his subjects, lightening the mood. Phu’s academic background is in Graphic Design, focusing on Animation and Motion Graphics.


I went over this internet site and I think you have a lot of fantastic info, saved to favorites (:.